The price matrix is where all selling prices are maintained for both standard line and recipe type products. Each product and portion size is assigned a price within a specific price bands. The matrix consists of 702 price bands, ranging from A to ZZ.
Price Matrix Topics
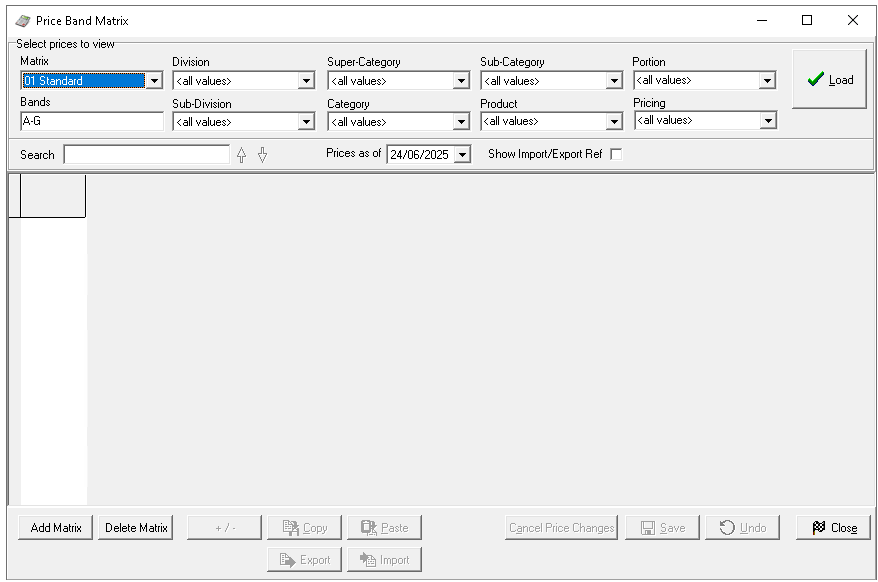
Loading the Matrix
Follow these steps to load the matrix:
-
Select the Price Matrix
If there is only one matrix in the organisation this is always selected -
Enter the required Price Bands to display
The default is always displayed as A-G but any price bands can be loaded using the following patterns
-
Alphabetical Range of Bands - for example H-J
-
Various Range of Bands - for example A,C,J,K
-
Alphabetical & Range of Bands - for example A,C,H-J
-
-
Select Filters to apply before loading the matrix, choose one or more of the following
-
Division
-
Sub Division
-
Super Category
-
Category
-
Subcategory
When selecting from the product structure, lower levels are automatically filtered. For example, choosing a 'Food' division will automatically narrow down the available options in the subsequent structure levels -
Portion
-
Product
-
Pricing
-
Priced Only
-
Unpriced Only
-
-
-
Select the check box to display Import / Export Reference (optional)
-
Set Prices As Of to the required date, or leave this on the current date for current prices
This option allows you to schedule price changes by selecting a future date on which the new prices will take effect -
Click Load
Managing Prices
Relevant products will be displayed based on the selected filters, allowing prices to be added or updated as needed.
Follow these steps to manage prices:
-
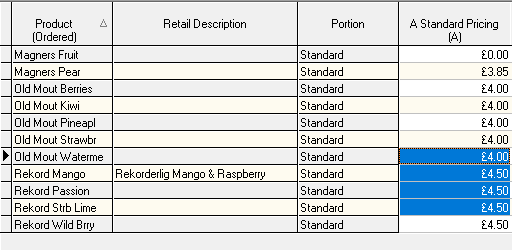
In the grid click into a price band cell and enter the required price for each product / portion
If there are any products that are free they should be entered as 0.00 - any cell left empty or null is classified as un-priced
All price updates are displayed in blue prior to save
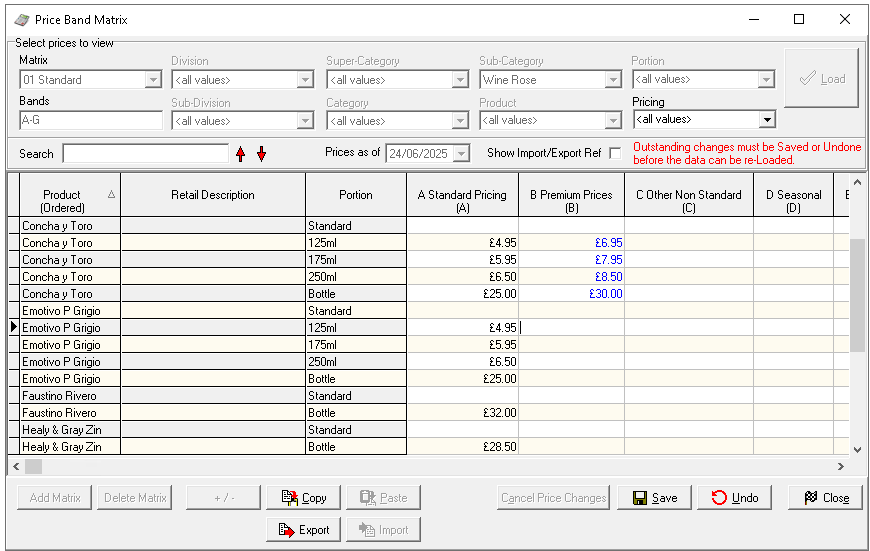 Clicking 'Undo' will revert prices to their original state before the matrix was loaded
 -
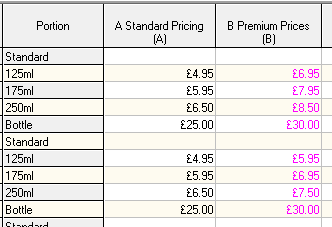
Click Save
After saving any price changes will be displayed in pink
Other Pricing Options
Naming Bands
Follow these steps to name price bands:
-
Double click the Price Band Header Row at the top of the screen
-
Enter the Price Band Name
Zonal recommends retaining the letter as part of the name, for example 'B Standard Prices' as the name entered will be displayed in sales area banding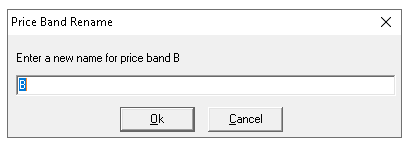
-
Click OK
Copying Prices - Full Bands
Follow these steps to copy all prices from one band to another:
-
Click the Price Band Header Row to select all prices
-
Click Copy
-
Select the destination price band by clicking the Price Band Header Row
-
Click Paste
-
Click Save
Copying Selected Prices
Follow these steps to copy selected prices from one band to another:
-
Click into first price cells to be copied
-
Keep the mouse button clicked and drag down the price band, release the mouse and prices will be selected
-
Click Copy
-
Select the destination price band cell where the prices are to be added
The cursor has to be in the first cell, paste will add all prices below -
Click Paste
-
Click Save
Bulk Adjust Prices
Follow these steps to use the bulk adjust prices option:
-
Make a selection of prices, either a full band or selected
-
Click + / -
-
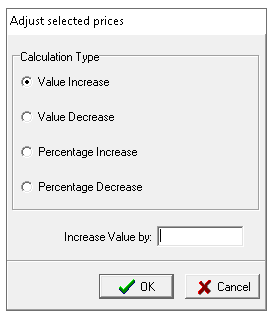
Choose an option
-
Value Increase
-
Value Decrease
-
Percentage Increase
-
Percentage Decrease
-
-
Enter the Monetary or Percentage Value
-
Click OK
Prices will update based on the option selected and value entered -
Click Save
Export / Import Prices
As an alternative to managing price changes directly within the price matrix, the data can be exported to a spread sheet, adjusted as needed, and then re-imported into the system.
Follow these steps to export / import price changes:
-
Load the price matrix with the required products that need prices changes
-
Click Export
-
Open Microsoft Excel or equivalent spread sheet and Paste the price information
Additional columns will be displayed when pasted into the spread sheet compared to viewing the price matrix
-
Update the prices in the price band columns as required
Care should be taken not to change any data in the columns A-K as this information is needed when re-importing back to the price matrix, any changes could cause the import to fail -
Copy all rows and columns of the pricing data
-
Load the price matrix with price bands that include the products that were selected within the original export
An alternative option is to load the price matrix with no filters applied and complete the import, this will ensure all products within the sheet successfully import and prices update -
Click Import
-
Click Save
Managing Matrices
While most organisations can operate with a single price matrix, using separate matrices may be beneficial when managing multiple brands or concepts, allowing for clearer pricing distinctions.
Adding
Follow these steps to add a matrix:
-
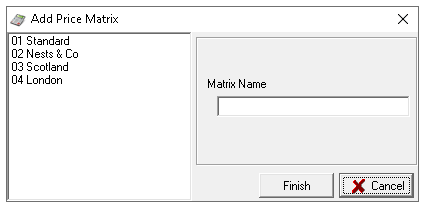
Click Add Matrix
-
Enter the Matrix Name
-
Optionally select an existing matrix to copy prices
-
Click Finish
Deleting
Follow these steps to delete a matrix:
-
Click Delete Matrix
-
Select the required matrix from the list
Only matrices that are not assigned to any sites can be deleted. If a deletion is attempted on an assigned matrix, a message will indicate that it is currently linked to a site -
Click Delete